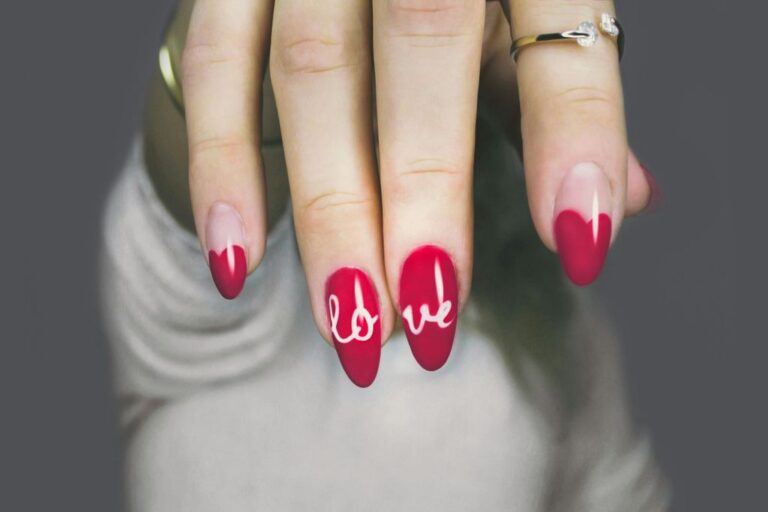
“Drying Dynamics: How Nails Dry Faster Unveiled”
Deprecated: mb_convert_encoding(): Handling HTML entities via mbstring is deprecated; use htmlspecialchars, htmlentities, or mb_encode_numericentity/mb_decode_numericentity instead in /home/u654140373/domains/nailinspire.com/public_html/wp-content/plugins/kadence-pro/dist/elements/elements-init.php on line 1267
Deprecated: Function utf8_decode() is deprecated in /home/u654140373/domains/nailinspire.com/public_html/wp-content/plugins/kadence-pro/dist/elements/elements-init.php on line 1275
Nail polish drying is a fascinating process that involves various scientific principles and factors. Understanding the dynamics of nail polish drying can help us achieve faster and more efficient results. In this article, we will explore the science behind nail polish drying and uncover practical tips for quicker drying. Additionally, we will discuss the technological advances in nail drying and address important health and safety considerations.
Key Takeaways
- Understanding the role of solvents in nail polish is crucial for optimizing drying time.
- Ambient temperature, humidity, and air flow significantly influence the drying time of nail polish.
- UV and LED nail lamps, innovative polish formulas, and quick-dry top coats can expedite the nail drying process.
- Effective application techniques and the use of cold water or ice baths can speed up nail polish drying.
- Choosing safer nail polish options and ensuring proper ventilation are essential for maintaining nail health and safety.
The Science of Nail Polish Drying

The Role of Solvents in Nail Polish
Nail polish owes its smooth application and glossy finish to the solvents it contains. These solvents serve a dual purpose: they keep the polish in a liquid state within the bottle and facilitate a quick drying process once applied to the nails. As the polish is brushed onto the nail, the solvents begin to evaporate, leaving behind the pigments and film-formers that create the nail polish’s color and shine.
Evaporation rate is a critical factor in drying time. The faster the solvents evaporate, the quicker the nail polish sets. However, if evaporation occurs too rapidly, it can lead to imperfections such as bubbles or a streaky finish. To strike the right balance, nail polish manufacturers carefully select a blend of solvents with varying evaporation rates.
Tip: To optimize drying time without compromising the polish’s quality, apply thin layers and allow each layer to dry completely before adding the next.
The choice of solvents also impacts the overall health and safety of the nail polish. Some solvents may release fumes that require proper ventilation during application. It’s important for consumers to be aware of the ingredients in their nail polishes and opt for options that prioritize safety without sacrificing performance.
Evaporation and Its Effects on Drying Time
Evaporation plays a pivotal role in the drying process of nail polish. As the solvent in the polish evaporates, it leaves behind the solid components that form the hard, glossy finish. The rate of evaporation is influenced by several environmental factors, with temperature being a key player. Higher temperatures generally accelerate evaporation, as they provide more energy to the solvent molecules, increasing their kinetic energy and enabling them to escape into the air more readily.
The humidity level in the environment also affects drying time. In high humidity conditions, the air is already saturated with moisture, which can slow down the evaporation rate of the solvents. Conversely, in low humidity, evaporation occurs more quickly, leading to faster drying times. Air flow is another important factor; a gentle breeze can effectively carry away evaporated solvent molecules, enhancing the drying process.
Tip: To optimize nail polish drying, consider the environment. Aim for a warm, low-humidity area with good air circulation. Avoid fans or strong winds that can cause smudging.
Understanding these factors can help in achieving a quicker and more durable manicure. By manipulating the environment to favor evaporation, one can significantly reduce the waiting time for nails to dry.
Chemical Reactions Involved in Setting Polish
The setting of nail polish is not merely a physical drying process, but also a complex series of chemical reactions. These reactions are crucial for transforming the wet polish into a hard, durable layer. The primary chemical process involves the polymerization of the polish’s ingredients, which creates long, interlocking chains of molecules that give the polish its strength and longevity.
Polymerization is typically initiated by exposure to air or light. In the case of traditional nail polishes, the solvent evaporation creates the right conditions for the polymer chains to form. However, for gel polishes, this process is accelerated and controlled by the use of UV or LED lamps. The light from these lamps activates photoinitiators within the gel, leading to a rapid and targeted curing process.
Here are some practical tips to ensure optimal setting:
- Avoid thick layers that can prevent even curing.
- Use the correct type of lamp for the polish formula.
- Follow the manufacturer’s recommended curing time.
Tip: To achieve the best results, apply thin, even coats and allow each layer to set properly before applying the next.
Factors Influencing Drying Times

Ambient Temperature and Humidity
The drying time of nail polish is significantly influenced by the ambient temperature and humidity levels. Higher temperatures typically expedite the evaporation of solvents in nail polish, leading to a quicker drying process. Conversely, cooler environments may extend the time it takes for your nails to dry.
Humidity plays a similarly crucial role. High humidity can slow down the drying process by preventing the evaporation of solvents, as the air is already saturated with moisture. On the other hand, low humidity environments are more conducive to faster drying times. It’s important to consider these factors when expecting your nails to dry promptly.
Tip: To optimize nail polish drying times, apply your polish in a controlled environment where you can manage temperature and humidity levels.
Thickness of Nail Polish Application
The thickness of nail polish application plays a crucial role in determining the drying time. Thicker application results in a longer drying time, as the layers of polish take longer to evaporate. Conversely, thin layers of polish dry more quickly, allowing for a faster overall drying process. It’s important to find the right balance between thickness and coverage to achieve optimal drying times. Here’s a simple guide to nail polish application thickness:
| Thickness | Drying Time |
|---|---|
| Thin | Fast |
| Medium | Moderate |
| Thick | Slow |
This table provides a quick reference for understanding the relationship between nail polish thickness and drying time. Remember, the key is to achieve a consistent and even application for the best results.
Influence of Air Flow on Drying Process
The drying time of nail polish can be significantly affected by the presence and movement of air around the nails. Air flow works to disperse the solvents in the polish, which are responsible for its liquid consistency. As these solvents evaporate, the polish hardens. Therefore, increasing air flow can expedite this evaporation process, leading to faster drying times.
Strategically positioning hands or feet to maximize exposure to air can be beneficial. For instance, using a fan or a specialized nail dryer that directs a steady stream of air onto the painted nails can enhance drying. However, it’s important to ensure that the air is not too hot, as excessive heat can cause the polish to bubble or smudge.
Tip: Gently waving hands back and forth or using a cool setting on a hairdryer are simple ways to increase air flow without the risk of overheating the polish.
In professional settings, technicians often use tools designed to optimize air flow around the nails. Here’s a list of common devices:
- Tabletop nail fans
- Handheld blowers
- Pedicure air dryers
- Built-in salon table fans
Each of these tools can provide a consistent and appropriate level of air flow to ensure that nail polish dries quickly and evenly.
Technological Advances in Nail Drying

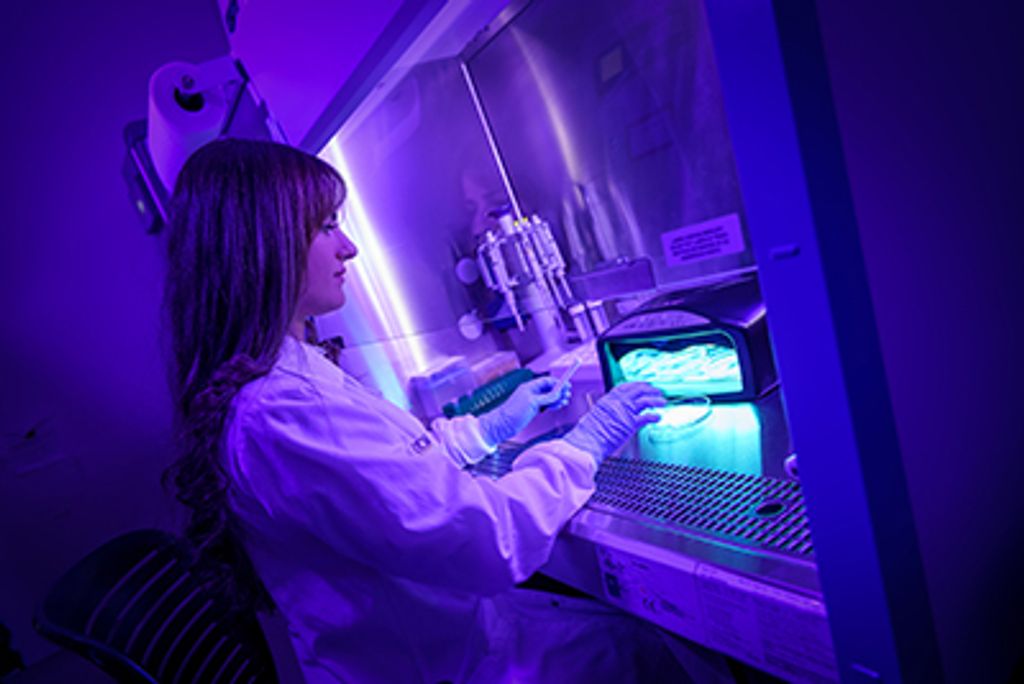
UV and LED Nail Lamps: Speeding Up the Process
The advent of UV and LED nail lamps has revolutionized the way we approach nail drying. These devices emit specific wavelengths of light that are designed to cure gel polish, hardening it in a fraction of the time it would take to air dry. The use of these lamps is not just about speed; it also ensures a more durable and long-lasting finish.
- UV lamps* typically require longer exposure times compared to their LED counterparts, which are known for their rapid curing abilities. Here’s a quick comparison:
| Lamp Type | Average Curing Time |
|---|---|
| UV Lamp | 1-3 minutes |
| LED Lamp | 30 seconds to 1 minute |
Tip: To maximize efficiency, ensure that the nail polish used is compatible with the type of lamp you are using.
While these lamps are a significant time-saver, it’s important to understand that they do not work with all types of nail polish. Traditional lacquers will not respond to the light emitted by these lamps and will require conventional drying methods.
Innovative Nail Polish Formulas
The beauty industry is constantly evolving, and nail polish is no exception. Innovative formulas are revolutionizing the way we think about manicures, with brands striving to create products that are not only aesthetically pleasing but also healthier for our nails. These new formulations often boast features such as being non-toxic, vegan, and environmentally friendly.
One of the key advancements in nail polish technology is the development of water-based formulas. These polishes are free from the harsh chemicals traditionally found in nail enamels, reducing the risk of damage to the nail bed and cuticles. Additionally, they are odorless and more breathable, which promotes better nail health in the long term.
Tip: When choosing an innovative nail polish, look for labels that indicate a ‘5-free’ or ‘7-free’ formula, which means they are devoid of certain harmful chemicals.
Another trend in the nail polish industry is the inclusion of nourishing ingredients that care for the nail while providing color. Ingredients like vitamins, minerals, and essential oils can help to strengthen and hydrate the nails during wear.
The Impact of Quick-Dry Top Coats and Sprays
Quick-dry top coats and sprays have revolutionized the nail care industry by significantly reducing the waiting time for nails to dry. These products work by forming a hardening layer over the nail polish, which seals in the color and accelerates the drying process. The effectiveness of these quick-dry solutions can vary based on their formulation and the quality of ingredients used.
- Quick-dry top coats* typically come in the form of a clear polish that is applied over the colored coat. They contain fast-evaporating solvents that enhance the drying speed. On the other hand, quick-dry sprays are applied directly to the nails after the polish has been applied, creating a barrier that prevents smudges and dents while drying.
Tip: For best results, apply quick-dry products in a well-ventilated area and wait for a few minutes before touching anything to ensure the nails are completely set.
While these products offer convenience, it’s important to consider their composition. Some may contain harsh chemicals that can be detrimental to nail health over time. Opting for water-based options can provide a safer alternative with fewer hazardous solvents.
Practical Tips for Faster Drying Nails

Effective Application Techniques
Achieving faster drying nails begins with the application technique. Thin layers are key; they dry more quickly and evenly than thicker ones. Start with a base coat, followed by two to three thin layers of polish, allowing each layer to set before applying the next. This method not only speeds up drying time but also helps prevent smudging and bubbling.
Consistency is also crucial. Ensure that each layer is of uniform thickness to avoid uneven drying. Here’s a simple guide to follow:
- Apply a thin base coat and let it dry.
- Add the first thin layer of color polish and wait for it to dry.
- Apply the second thin layer and allow it to dry completely.
- Finish with a thin top coat for extra shine and protection.
Tip: To expedite the drying process, avoid shaking the polish bottle before use, as this can introduce air bubbles. Instead, roll it between your hands to mix the contents.
The Role of Cold Water and Ice Baths
The age-old trick of using cold water and ice baths to expedite the drying of nail polish is more than just an old wives’ tale. Submerging freshly painted nails into cold water helps to harden the polish faster. This is because the cold causes the solvents in the nail polish to evaporate more rapidly, solidifying the polish.
To utilize this method effectively, follow these simple steps:
- Paint your nails and allow them to air dry for a minute or two.
- Prepare a bowl of cold water and add a few ice cubes.
- Gently dip your fingertips into the cold water for about three to five minutes.
- Remove your hands and let the nails air dry completely.
Tip: Be careful not to touch the edges of the bowl or move your fingers too much while submerged to avoid smudging the polish.
While this technique is helpful, it’s important to note that it does not replace proper drying time. It’s a quick fix that can be used when you’re in a rush, but for the best results, patience is key.
Avoiding Common Mistakes That Prolong Drying
Avoiding common mistakes that prolong the drying process is crucial for achieving quick-drying nails. One important tip is to ensure proper ventilation in the drying area, as stagnant air can significantly delay the drying time. Additionally, gentle tapping the nails after applying polish can help speed up the process by promoting evaporation. It’s also advisable to avoid excessive layers of polish, as this can lead to longer drying times. Finally, consider using a quick-dry top coat to seal in the color and accelerate the drying process.
Health and Safety Considerations

Potential Risks of Quick-Dry Methods
Quick-dry methods can pose potential risks to nail health and integrity. The accelerated drying process may lead to increased exposure to chemicals, which can result in weakened nails and increased risk of damage. It’s important to weigh the convenience of quick-dry methods against the potential long-term effects on nail health. Consider opting for safer nail polish options and prioritize proper ventilation and exposure limits to minimize the risks associated with rapid drying techniques.
Choosing Safer Nail Polish Options
In the quest for faster drying nails, health and safety should never be compromised. Opting for non-toxic nail polishes is a step towards safer manicures. These polishes are often categorized by the number of harmful chemicals they exclude, such as formaldehyde, dibutyl phthalate (DBP), and toluene. For instance, a ‘10-free‘ label indicates the absence of ten specific toxic ingredients.
When selecting a safer nail polish, consider the following:
- The ‘free’ number: Higher numbers generally mean fewer chemicals.
- Ingredient transparency: Brands should clearly list what’s in their products.
- Certifications: Look for vegan, cruelty-free, or eco-friendly labels.
Tip: Always apply nail polish in a well-ventilated area to minimize inhalation of any fumes.
Remember, while quick-dry methods are convenient, they should not come at the cost of your well-being. Prioritize products that balance efficiency with health-conscious formulations.
Proper Ventilation and Exposure Limits
Proper ventilation and exposure limits are crucial for minimizing the risks associated with nail drying processes. Adequate ventilation helps in reducing the possibility of excessive chemical exposure via inhalation. It is important to maintain good ventilation while using UV or LED nail lamps, as the curing process can release strong odor. Work in a well-ventilated area to ensure safety and minimize exposure to UV or LED light. Nail technicians should use protective measures to limit their exposure to UV or LED light. Subscribe to NAILinspire.com to stay updated on the latest nail care tips and techniques.
When it comes to nail art, health and safety considerations are of utmost importance. At NAILinspire.com, we prioritize the well-being of our users by providing valuable information on safe nail art practices. From proper ventilation to the use of non-toxic materials, we are committed to promoting a healthy and safe nail art experience. Visit NAILinspire.com today to explore our extensive library of nail art designs and discover the perfect balance between creativity and safety.
Frequently Asked Questions
How long does it take for nail polish to dry?
The drying time for nail polish can vary depending on factors such as the type of polish, application thickness, and environmental conditions. On average, it takes about 1-2 hours for nail polish to fully dry.
Do quick-dry nail products really work?
Quick-dry nail products, such as top coats and sprays, can help speed up the drying process. However, their effectiveness may vary based on individual nail polish formulas and application techniques.
Can I use a hair dryer to dry my nails faster?
Using a hair dryer on a cool setting can help accelerate the drying process of nail polish. It’s important to maintain a safe distance to avoid heat damage to the polish and skin.
What is the best way to prevent smudges and dents while waiting for nails to dry?
To prevent smudges and dents, it’s recommended to allow sufficient drying time and use quick-dry products or techniques. Avoiding activities that can put pressure on the nails is also helpful.
Are UV and LED nail lamps safe for drying nails?
UV and LED nail lamps are commonly used to expedite the drying of gel and hybrid nail polishes. When used according to manufacturer instructions, they are generally considered safe, but prolonged exposure should be avoided.
How can I make my nail polish last longer without sacrificing drying time?
To extend the longevity of nail polish without compromising drying time, proper application techniques, such as thin and even coats, and using quality base and top coats can help enhance durability while maintaining reasonable drying times.