“Siding Styles: What Nails to Use for Siding Perfection”
When it comes to siding installation, choosing the right nails is crucial for ensuring a secure and visually appealing result. This article explores the compatibility of different siding materials with specific nail types, factors influencing nail selection, installation techniques, common issues, and regulations. Understanding these aspects is essential for achieving siding perfection.
Key Takeaways
- Matching the nail type to the siding material is essential for optimal performance and longevity.
- Consider weather and corrosion resistance when selecting nails to ensure durability and longevity of the siding installation.
- Proper nail length, penetration depth, and spacing are critical for the stability and longevity of the siding.
- Prevent siding issues by ensuring correct nail placement and movement to avoid buckling and damage.
- Compliance with local building codes and safety standards for siding nails is crucial for a safe and legal installation.
Understanding Siding Materials and Nail Compatibility

Wood Siding: Traditional Charm, Specific Nail Needs
Wood siding is a timeless choice that offers natural beauty and a classic look to any home. However, the selection of the right nails is crucial for ensuring the longevity and appearance of the installation. Hot-dipped galvanized nails are often recommended for wood siding due to their resistance to rust and corrosion. Spiral shank nails, such as the 2 in. (6D) Hot Dipped Galvanized Spiral Siding Nail, provide excellent holding power and are less likely to back out over time.
For those seeking a seamless aesthetic, Finish-Matched Fasteners can be a game-changer. These custom-colored nails blend perfectly with the siding, ensuring that the hardware is virtually invisible, preserving the wood’s natural charm.
Tip: Always consider the wood’s hardness and the local climate when selecting nails for wood siding. Softer woods may require a nail that can penetrate without splitting the material, while harsh weather conditions demand nails that can withstand the elements.
When installing wood siding, it’s important to choose the correct nail length. Nails should be long enough to penetrate at least 1 1/2 inches into the studs. Below is a list of considerations for nail selection:
- Nail length and diameter
- Material compatibility
- Local weather conditions
- Aesthetic preferences
By paying attention to these details, you can ensure that your wood siding remains secure and beautiful for years to come.
Vinyl Siding: Synthetic Ease and Nail Selection
Vinyl siding offers a blend of durability and ease of maintenance that makes it a popular choice for homeowners. When it comes to fastening this type of siding, the right nail selection is crucial to ensure a secure and lasting installation. Unlike wood siding, vinyl siding requires nails that can accommodate its expansion and contraction due to temperature changes.
For vinyl siding, corrosion-resistant nails are a must, as they will be exposed to the elements. Typically, aluminum or galvanized steel nails are recommended. These nails should have a shank that’s thin enough to prevent splitting the vinyl but sturdy enough to hold it in place. The heads should be of a low profile yet capable of firmly securing the siding without restricting movement.
Tip: Always leave a slight gap between the nail head and the siding to allow for thermal expansion.
When selecting nails for vinyl siding, consider the following points:
- Use nails with a minimum shank diameter of 0.120 inches.
- Choose nails with a head diameter of at least 5/16 inches.
- Ensure nails are long enough to penetrate at least 3/4 inches into the sheathing.
By paying attention to these details, you can achieve a flawless finish that stands the test of time.
Fiber Cement Siding: Durability and Fastening Requirements
Fiber cement siding is renowned for its durability and resilience against the elements. When it comes to fastening this type of siding, it is crucial to use the right nails to ensure a secure and lasting installation. Corrosion-resistant ring-shank nails are typically recommended due to their superior holding power and resistance to weathering.
Proper fastening is essential; improper techniques can lead to loose boards that are prone to damage. The standard requirement for fastening fiber cement siding is the use of 7/16 inches + OSB or plywood backing. This provides a solid foundation for the nails and siding.
Tip: Always pre-drill holes for the nails to prevent cracking and to facilitate easier installation.
Adhering to these guidelines will help maintain the integrity of the siding over time, ensuring that it continues to protect and enhance the appearance of your home.
Metal Siding: Industrial Appeal and Secure Fastening
When it comes to Metal Siding, the emphasis is on secure fastening to ensure durability and stability. The use of specially designed siding nails is crucial for achieving the desired industrial appeal and long-lasting performance. These nails are engineered to provide optimal holding power and resistance to weather and corrosion. They are available in various sizes to accommodate different metal siding thicknesses and weights. Proper nail selection and installation techniques are essential for achieving flawless results with metal siding.
Nail Types and Their Distinctive Features

Common Nails: The Basics for Siding Projects
Common nails are the workhorses of the siding world, known for their versatility and strength. They are typically made from high-carbon steel, which ensures durability and a firm hold. These nails are characterized by their thick shanks and large, flat heads, making them ideal for projects that require a sturdy grip, such as framing and roughing in.
When selecting common nails for siding, it’s important to consider the nail length and diameter, which should be appropriate for the thickness of the siding material. For instance, a 2-1/2" 8d common nail is a popular choice for various applications, including face-nailing floors and cabinet work.
Tip: For exterior siding projects, consider using hot-dip galvanized common nails to prevent rust and corrosion, ensuring a longer-lasting installation.
Remember, while common nails provide a strong hold, they may not be suitable for all types of siding materials. It’s crucial to match the nail type to the siding to avoid any potential issues such as splitting or insufficient hold.
Box Nails: Lighter Hold for Thinner Siding
When it comes to installing thinner siding materials, box nails offer an ideal solution. Their slender shank and lighter gauge make them less likely to split delicate siding, such as thin wood or vinyl. Box nails are typically made from aluminum or stainless steel, providing sufficient durability without the bulk of common nails.
Box nails are characterized by their thin shank and head, which are designed to minimize the impact on the siding’s appearance. They are particularly useful when a more subtle, less visible fastening solution is desired. Here’s a quick guide to choosing the right box nail for your siding project:
- Select a nail length that will penetrate at least 1-1/2 inches into the studs.
- Choose a nail gauge that corresponds to the siding’s thickness and density.
- Opt for a corrosion-resistant coating if the siding is exposed to harsh weather conditions.
Tip: Always pre-drill holes for box nails when working with very thin or brittle siding to prevent splitting.
While box nails provide a lighter hold, they should not be underestimated. Their design is a balance between holding power and discretion, ensuring that your siding remains secure while maintaining its aesthetic appeal.
Siding Nails: Designed for Optimal Holding Power
Siding nails are specifically engineered to provide the best possible grip and durability for siding projects. These nails are characterized by their ring shanks or spiral designs that dig into the siding material, creating a hold that is resistant to weather and the natural expansion and contraction of the siding material over time.
Hot dipped galvanized or stainless steel siding nails are recommended for their resistance to rust and corrosion. The length of the nail is crucial; it must be long enough to penetrate not only the siding but also to secure firmly into the sheathing or framing beneath.
When selecting siding nails, consider the following:
- The type of siding material (wood, vinyl, fiber cement, etc.)
- The environmental conditions (coastal areas may require stainless steel)
- The desired finish (some nails have smaller heads for a more discreet appearance)
Tip: Always ensure that the nails used are compatible with the siding material to prevent damage and to guarantee a lasting installation.
Roofing Nails: When to Use Them for Siding
While roofing nails are primarily designed for roofing applications, they can also be suitable for certain types of siding installation. These nails are characterized by their wide, flat heads and short shank, which provide strong holding power without causing damage to the material.
- Roofing nails are ideal for attaching lightweight siding materials such as vinyl or aluminum.
- They are also useful when applying asphalt shingles, insulation board, or felt to wood substrates.
When selecting roofing nails for siding, it’s important to consider the nail length and the material of the nail. Electro-galvanized roofing nails, for example, offer enhanced corrosion resistance, making them a viable option for siding in areas with high moisture or salt exposure.
Tip: Always ensure that the chosen nail length allows for adequate penetration into the sheathing or framing, without protruding through the interior wall.
Compliance with local building codes is crucial, as they may specify the type of nails required for siding projects in your region. Always check these regulations before proceeding with your installation to ensure a secure and legal outcome.
Factors Influencing Nail Selection for Siding

Siding Weight and Thickness: Matching Nail Size
Selecting the appropriate nail size for your siding project is crucial for ensuring a secure and lasting installation. The weight and thickness of the siding material directly influence the length and diameter of the nails required. For instance, heavier and thicker siding materials like traditional wood planks will necessitate longer and thicker nails to achieve adequate penetration and holding power.
Lightweight siding options, such as vinyl, can be effectively secured with shorter nails. It’s essential to match the nail size to the siding’s specifications to prevent issues such as buckling or detachment over time. Below is a general guideline for matching nail sizes to common siding materials:
- Wood Siding: 8d to 10d nails, 2 1/2" to 3" in length
- Vinyl Siding: 4d to 6d nails, 1 1/2" to 2" in length
- Fiber Cement Siding: 6d to 8d nails, 1 3/4" to 2 1/4" in length
- Metal Siding: 1 1/2" to 2 1/2" metal screws or nails
Tip: Always verify the manufacturer’s recommendations for nail size and type to ensure optimal performance and to maintain warranty coverage.
Weather and Corrosion Resistance: Choosing the Right Material
When selecting nails for siding, it’s crucial to consider the weather and corrosion resistance of the materials. Nails that are resistant to rust and corrosion will ensure a longer lifespan for your siding, especially in areas with high humidity or coastal environments where salt spray is prevalent.
Stainless steel nails are often recommended for their superior resistance to rust and corrosion. However, they can be more expensive than other options. Galvanized nails are a more cost-effective alternative, offering a protective zinc coating that shields the nail from moisture and delays the onset of rust.
Tip: Always match the nail material to the siding material to prevent galvanic corrosion, which can occur when dissimilar metals are in contact.
For regions with severe weather conditions, choosing the right nail material is not just a matter of durability, but also of safety. Properly selected nails will help to keep siding securely attached to your home during storms and high winds.
Aesthetic Considerations: Nail Head Visibility and Color
When it comes to the aesthetic integration of nails in siding projects, the visibility of nail heads and their color can significantly impact the final appearance. Nail head visibility should be minimized to ensure a clean, unobtrusive look. This is particularly important for siding materials like vinyl or fiber cement, where large nail heads can disrupt the smooth surface aesthetic.
Color matching is another aesthetic consideration. Nails are available in a variety of colors to blend seamlessly with the siding material. For instance, a siding nail with a color-coated head can be chosen to match the siding, making the nails less noticeable. Here’s a quick guide to nail head types and their typical visibility levels:
- Countersunk: Nails designed to sit flush with the siding surface, offering a discreet appearance.
- Painted Head: Nails with heads painted to match the siding color, reducing visual impact.
- Cap Nails: Often used with insulation board, these have a plastic cap that may be more visible.
Tip: Always consider the potential for nail heads to fade or change color over time due to exposure to the elements. Select nails with UV-resistant coatings to maintain their intended appearance for longer.
Installation Techniques for Flawless Siding

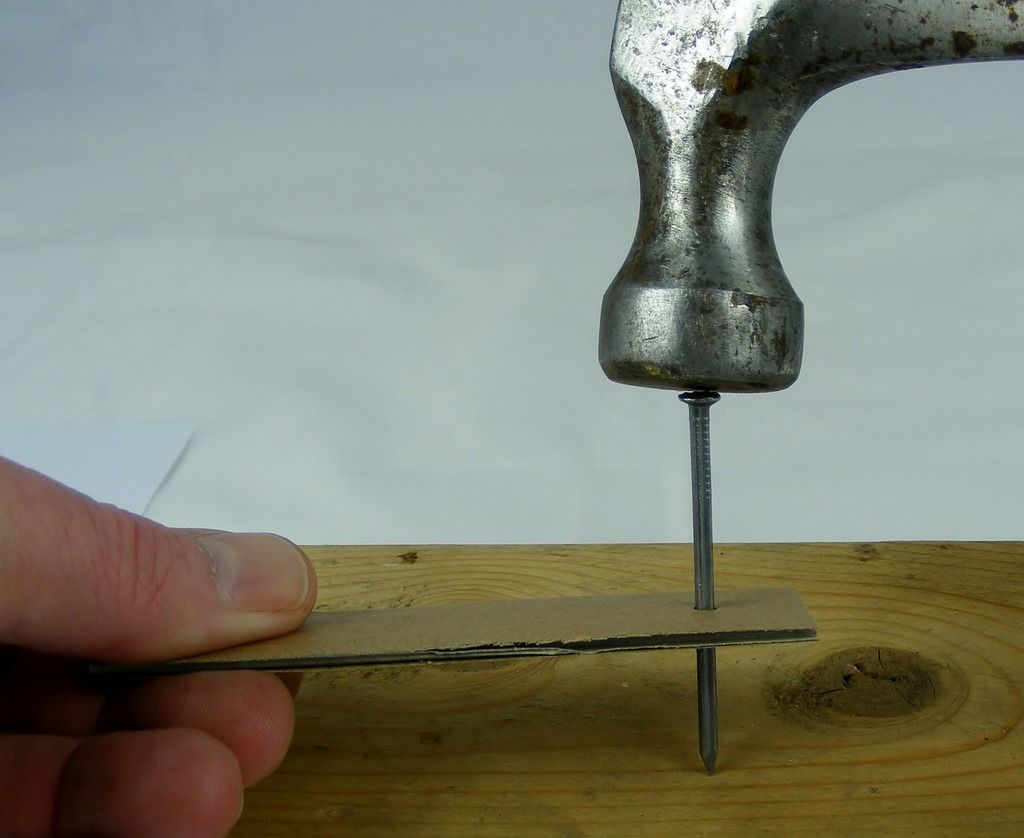
Proper Nail Length and Penetration Depth
Selecting the correct nail length is crucial for ensuring that siding is securely attached without causing damage. The general rule of thumb is that the nail should penetrate at least 1 1/4 inches into the studs. However, the specific requirements can vary based on the type of siding material and the local building codes.
- For wood siding, it’s essential to choose a nail that’s long enough to penetrate both the siding and the sheathing beneath it.
- Vinyl and fiber cement siding often require shorter nails due to their different expansion and contraction rates.
- Metal siding typically demands longer nails for a secure hold due to its rigidity and potential for thermal movement.
Tip: Always ensure that the nail penetrates the stud by at least 3/4 of an inch to provide a strong anchor for the siding.
Understanding the depth of penetration is also important to prevent the siding from buckling. Nails should be driven in flush with the siding surface; overdriving can lead to indentations and underdriving may cause the siding to be loose.
Nail Spacing Guidelines for Siding Stability
Achieving siding stability is crucial for the longevity and appearance of your home’s exterior. Proper nail spacing is a key factor in this process. For most siding materials, a general rule is to space nails no more than 16 inches apart when fastened to studs. However, specific siding types may require different spacing to accommodate for expansion and contraction.
- For wood siding, nails should be spaced at a maximum of 24 inches on center.
- Vinyl siding often requires closer spacing, typically around 12 to 16 inches, to ensure adequate wind resistance.
- Fiber cement siding manufacturers may specify spacing as close as 8 inches on center near edges and corners for added stability.
Tip: Always refer to the manufacturer’s installation instructions for the most accurate nail spacing guidelines.
Remember that the spacing may also vary depending on whether the siding is installed horizontally or vertically. It’s essential to maintain consistent spacing to prevent buckling and to allow for natural movement of the siding materials. In areas prone to high winds or extreme weather, tighter spacing may be necessary to prevent damage.
Driving Nails: Best Practices for a Smooth Finish
When driving nails for a smooth finish, it’s crucial to ensure the proper nail length and penetration depth. This helps in achieving a secure hold without damaging the siding material. Additionally, following nail spacing guidelines is essential for maintaining siding stability and preventing any warping or buckling over time. Implementing these techniques will result in a flawless siding installation that stands the test of time.
Troubleshooting Common Siding and Nail Issues

Preventing Siding Buckling: Nail Placement and Movement
When it comes to preventing siding buckling, nail placement and movement play crucial roles. Properly positioning the nails and ensuring minimal movement are essential for maintaining the integrity of the siding. To achieve this, consider the following guidelines:
- Use nails with the appropriate length and diameter for the siding material.
- Space the nails according to the manufacturer’s recommendations to distribute the load evenly.
- Avoid overdriving the nails, as excessive force can cause damage to the siding.
Remember, the goal is to secure the siding without compromising its structural integrity. By following these guidelines, you can minimize the risk of siding buckling and ensure a durable, long-lasting installation.
Dealing with Rust and Corrosion on Siding Nails
Rust and corrosion can significantly compromise the integrity of siding nails, leading to potential siding failure. To combat this issue, it’s essential to select nails with the right surface treatment. Galvanized nails, for example, offer a layer of protection against the elements. There are two main types of galvanization: electric and hot-dip, with the latter providing a thicker and more durable coating.
When rust does occur, immediate action is required to prevent further damage. A simple yet effective approach is to use a rust stain remover. Apply the product directly to the affected area and allow it to work before rinsing with water. This can help maintain the aesthetic appeal and structural integrity of your siding.
For long-term maintenance, it’s crucial to use nails that are inherently resistant to corrosion. Galvanized common iron wire nails are a popular choice for their durability. Regular inspection and prompt replacement of any compromised nails can prevent larger issues and extend the life of your siding.
Repairing Loose Siding: Nail Selection and Replacement Techniques
When it comes to repairing loose siding, the nail selection is crucial for ensuring a secure and long-lasting fix. Choosing the right type of nail, such as siding nails designed for optimal holding power, is essential for maintaining the integrity of the siding. Additionally, replacement techniques should focus on proper nail penetration depth and spacing guidelines to prevent future issues. It’s important to carefully consider the material of the replacement nails to ensure weather and corrosion resistance, especially in areas prone to harsh weather conditions. Implementing these techniques will result in a flawless repair that enhances the overall durability and appearance of the siding.
Siding Nail Regulations and Building Codes

Understanding Local Building Codes for Siding Installation
When it comes to siding installation, adhering to local building codes is not just a recommendation—it’s a requirement. These regulations are in place to ensure that all siding work meets safety and durability standards, which can vary significantly from one region to another. It’s essential to familiarize yourself with the specific codes that apply to your area before beginning any siding project.
Local building codes often dictate the types of nails that can be used, the method of installation, and even the materials that are acceptable for use. For example, some areas may require stainless steel nails due to their resistance to corrosion, especially in coastal regions where salt spray is a concern. Others might specify the size and spacing of nails to prevent siding from buckling under extreme weather conditions.
Always consult with a local building official or a professional contractor who is knowledgeable about the current building codes in your area. They can provide valuable guidance and help you avoid costly mistakes or potential fines for non-compliance. Remember, compliance with local building codes is not only about legality but also about ensuring the longevity and performance of your siding.
Compliance with Safety Standards for Siding Nails
Ensuring compliance with safety standards for siding nails is not just a matter of regulatory adherence but also a commitment to the longevity and integrity of the siding project. It is essential to select nails that meet the performance requirements specified by safety standards to prevent future complications such as structural failures or safety hazards.
Quality of materials is paramount when considering safety standards. Nails must be able to withstand environmental stresses without compromising the siding’s stability. This includes choosing nails with the right corrosion resistance, especially in areas prone to harsh weather conditions or high humidity.
Always verify that the nails used are rated for the specific type of siding installed. This ensures that the nails will provide adequate holding power and will not fail prematurely.
Compliance also extends to the installation process itself. Proper techniques must be followed to ensure that nails are driven correctly and that the siding is securely attached to the building structure. Failure to comply with these standards can result in not only regulatory issues but also in increased risk of damage or injury.
When it comes to siding nail regulations and building codes, it’s important to stay informed and compliant. At NAILinspire.com, we provide valuable resources and information on nail art design, including the latest trends, techniques, and inspiration. Whether you’re a professional nail artist or a DIY enthusiast, our website is the ultimate online library for all things nail art. Explore our collection, learn new skills, and unleash your creativity with NAILinspire.com.
Frequently Asked Questions
What type of nails should I use for wood siding?
For wood siding, it is recommended to use stainless steel or hot-dipped galvanized nails to prevent corrosion and ensure a secure hold.
Can I use roofing nails for vinyl siding installation?
No, roofing nails are not suitable for vinyl siding as they may not provide the necessary holding power and may lead to cracking or damage to the siding.
How do I prevent rust and corrosion on siding nails?
To prevent rust and corrosion on siding nails, use nails made of corrosion-resistant materials such as stainless steel or hot-dipped galvanized steel.
What is the best nail spacing for fiber cement siding?
The recommended nail spacing for fiber cement siding is 6-8 inches apart, ensuring proper support and stability for the siding panels.
Can I paint the nail heads to match the siding color?
Yes, you can paint the nail heads to match the siding color for a seamless and aesthetically pleasing finish.
Are there specific regulations for siding nail types in building codes?
Yes, local building codes may specify the type and material of nails to be used for siding installation to ensure structural integrity and compliance with safety standards.